Pages

Wednesday, August 29, 2012

Stuff

Sometimes I think that I can see potential in almost anything, especially in things that are free or a really good deal. This can be a good thing, particularly when trying to furnish and decorate a house with limited funds, but it also leads to the accumulation of a bunch of stuff. We haven't even parked in our garage in the 2 years that we have lived here because it has project after project being stored out there.

When I brought home two large sets of bench drawers, I knew that I needed to get to them quickly so that they weren't just adding to the chaos.


I knew exactly what I wanted one set for, and I figured that since they were free, I could easily find another use for the other set. They were in ok shape, even though one set had a little bit of mold. I didn't know that until I got them home, but with some bleach water and some sanding, I got all of it off fairly easily and fairly quickly. 


After a light sanding and wiping down to disinfect them, I did the usual priming and two coats of paint. 


I really wanted one set of the drawers to fit under Bug's big girl bed. I knew that they were a little bit too long for the space, but I was hoping that it wouldn't be too noticeable. Of course, it was way too noticeable. It pushed the sides of her bed out at a really strange angle. Don't worry though, I pulled out my trusty jigsaw, and cut about 2 inches off of each side of the drawer frame. 


My straight cutting skills are somewhat lacking, and I think that it would have been pretty hard to cut straight anyway, so the edges are a little big jagged. I think that I am going to put a little piece of trim there to hide that part, but haven't done it yet.


And here it what the drawers look like under the bed. I really like the way that they fit there. It is nice too, because it was just dead space before, collecting dust and toys. I happened upon the bed last year at a local thrift store and it was only $25, way too good to pass up.

Now there is a drawer for extra blankets,


a drawer for grow-into-clothes,


and a drawer for the toys that Bug doesn't want little sister to get to.


I have loved the bed ever since we put it in the room. I had thought about trying to build some drawers to go under it, but I think that this turned out better than I could have done from scratch.


It is hard to tell that the drawers didn't come with the bed. If I ever get the trim to hide the cut lines, it will be even harder to tell. Definitely worth the $25 and the labor that I put into it.

Yeah, so there is one more project done and one more large piece of furniture out of the garage.

-Mandi

Saturday, August 25, 2012

Book Storage


Sometimes it takes me a long time to get something "finished." The reading nook in Little Bug's room has pretty much been finished for months now except that I wanted a good way to store her books. I have been using baskets to store them, but as she has accumulated more books over the years, they no longer fit in just one basket, not to mention they got way too heavy and the baskets ended up looking like this:


Little girls are surprisingly hard on things, and baskets weren't cutting it, so I decided to try something new. I had seen some cool tutorials about using rope wrapped around containers to give it a basket or Pottery Barn look, so I went shopping. 


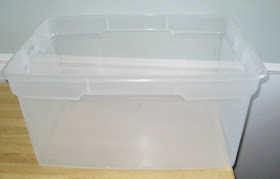
I found this large Sterlite container at a thrift store for $2. It didn't have a lid, but I didn't need one, so I bought it anyway. I bought a 50ft roll of sisal rope at Lowes for $9, and I was set to go. The problem here, that one roll of rope was not going to be enough, and buying another roll didn't really equal out to be an inexpensive storage solution like I wanted it to be. This is about 6 rows wrapped around the container and I only had 1/3 or so of the roll left. It would have probably taken me at least 3 rolls to cover the whole thing. 


So, I moved on to my next idea. I remembered seeing an idea here for a fabric covered plastic storage bin. I already had some canvas on hand from another project, so I set to work. I used Modge Podge to stick it to the sides of the container, and left enough of an overhang to fold over to the bottom. It was fairly easy and took about 30 minutes. I also used some cute fabric that I had on hand to create a faux liner for the bin. It is durable, looks cute under the nook bench, and holds a lot of books.


The other thing that I have debated about doing in the nook for a long time was adding shelves for books along the sides. It is a pretty cozy space, so I knew that the shelves would have to be pretty low profile. Yesterday, I finally decided to just go for it, and I really like how they turned out. When I first made the reading nook, there were a couple of shelve that I removed to make room for the bench. The supports for those shelves were still there, so I just screwed a narrow piece of wood onto the bottom of the supports, and then added an even smaller piece of wood to create a lip. I painted them green to match her room, and they were ready to add books. 


I really like the way that they turned out. They are only about 4 inched wide, so they don't take up too much space. Since I was able to use scrap wood that we had laying around to make them, they were also free, and took about 2 hours to build, paint, and install. 


Bug likes her new shelves. She has already changed out the books several times, and likes that all of the rest of her books now fit into one basket. And now, except for maybe rearranging the upper shelves, I can say that I have officially finished the reading nook.

-Mandi

Monday, August 20, 2012

Zion's Market

In my neighborhood, every couple of years, there is a cool event held called Zion's Market. It is organized by the Relief Society in my ward and the other two wards that share our church building. On the Friday before the market, everyone can bring their donations, anything that they were going to donate to thrift stores or sell at garage sales. Pretty much anything in good useable condition goes. It is a pretty big undertaking, but there are many volunteers at the church to sort through what everyone brings, organizing into different categories. Then, on Saturday, the neighborhood is invited to go shopping. There is no money exchanged, everyone can just go and take what they need. It is fun to go thrifting without having to spend any money, and at the end whatever hasn't been taken by people at the market is loaded into a trailer and donated to a local thrift store. It is also neat to see how some people's junk can become another person's treasure.

Here are a some of the things that I was able to get at Zion's Market:


These two cane back chairs. I spray painted them black and covered the seats with some canvas, but I think that I may change them up a little bit more.


This awesome lantern. It was brass color when I got it, but I was able to take it apart and spray paint it oil rubbed bronze. It now provides some much needed light in my craft room.


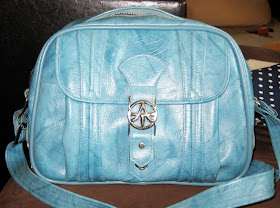
This cool retro bag.


Some canvas fabric and some satin fabric. I have plans to make some canvas storage bins and some cute polka dot skirts for my girls.


A pile of clothes for each of my girls.


These were two sets of drawers that I think were part of a queen-sized bed. I took them with a few ideas of some places that I could use them in my house, and I have been working on painting and retro-fitting them. They will be in two future posts very soon. I had to work on them quickly because they were taking up valuable driveway space.

-Mandi