Friday, June 29, 2012

Five on Friday: Things I love

Last night I finished a book that I have been reading the past few days. It reminded me how much I love to read. I haven't made it as much time for reading in my life the past few years, but when I find a good book or a good series, all I want to do is read. Anyway, thinking about how much I enjoyed this book, made me think about how much I have enjoyed some other things lately. So, instead of doing completed projects for this week, I decided to write a completely random post about some of the things that I have been loving lately. 

1. The Fable Haven Series by Brandon Mull

Link


I know that most of my siblings have read this, and I am late jumping on the bandwagon, but these are really good books. I read the first one a few years ago, but read books 2 and 3 this week and still have 4 and 5 to look forward to. I also love that all of the books are out so that you can read them one after another and not have to wait years for the next one to come out. They are children's' fantasy/adventure books, so they read quickly, and I found them very entertaining. 

2. Homemade Spinach Tortillas


I saw this recipe on Pinterest awhile back and decided to give it a try. The recipe is from here. They were really good, fairly easy, and I have even made them a couple of times since. We have eaten them with tacos, fajitas, and tostadas. 

3. 9-month olds


This is a given, that I would love my baby, but she has been so happy and so much fun lately, that I had to add her to the list. Her little smile and her funny faces make me laugh. She is crawling and into everything, putting everything into her mouth, and keeping me on my toes. She gives great hugs and slobbery kisses, and makes me so thankful that I get to be her mom. 

4. 3-year olds


Another given, I know, but my little Bug is so fun and so smart that I had to add her as well. She has not been super cooperative with pictures lately, so most of the pictures that I have are silly or extremely candid. These pictures were after I asked her to just smile and be normal. I even gave up on that and just asked her to sit still for a minute. This is what she gave me. 

5. Caribbean Workout exercise videos. 


I have not been very dedicated to losing baby weight. I am trying to get more motivated, but with two little girls it can be hard to find the time. So, I came to the conclusion that some things like running and going to the gym may not be for me right now, but I can do an exercise video even with my girls. Little Bug loves doing yoga with me and makes me laugh the whole time. I do feel better when I do them, and as soon as I get back into a regular workout schedule maybe I can start adding running and some other things back in as well. 

-Mandi

Tuesday, June 26, 2012

Tree Branch Mobile

I have a pretty awesome husband. When I was pregnant with Little Bug, he surprised me one weekend and converted the spare room of our apartment into a nursery. He chose the bedding and everything. I loved it so much, and it was still in such good condition, that we pretty much left everything the same when our little baby girl was born last year. It is her lot in life to be the recipient of many many hand-me-downs. I did want to add a few things to the nursery that would be just for her, and so I have been working on some projects here and there. 


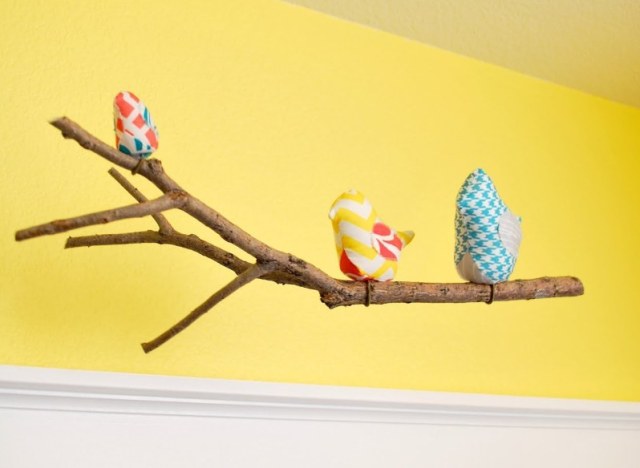
I wanted something to fill the space above her changing table. I have seen several really cute tree branch and bird mobiles, so I decided to give one a try. It was surprisingly easy to make, came together well, and helped to bring some color and interest to that part of her room. 


Here are some of the mobiles that inspired me:


Source

Source
Source


Source


Source

Here is how I did everything:

1. Branch: I started with just a plain old tree branch. (We had a huge windstorm a few months ago, and there were branches strewn everywhere. I wanted it to be long, I think that the one I chose was about 3 feet long. I did trim off some of the smaller branches that were coming off of it, until I got a shape that I liked. I used Modge Podge to clue white strips of paper around the tree for a paper mache type look, but I think that it would have been easier/less messy if I had used spray paint, and I think that I would have liked it just as well.

2. Flowers: I drew a simple flower shape. I ended up using one with 5 petals and one with 6 petals so that I could layer them. Each flower requires two flower cut-outs, which I cut out of patterned scrapbook paper. I then put a dab of hot glue to stick the 5-petal flower onto the 6 petal flower. Then, fold the petals in toward the center and crease slightly so that they stick up a little bit. I used some circle rhinestone stickers that I had for the flower centers, but you could use buttons, or paper circles too. 

3. Leaves: I drew a football shape pattern and used it to cut leaves on green cardstock. I wanted some variation in the green, so I used three differed shades of green for the leaves. I then folded then in half lengthwise so that they would look more three-dimensional.

4. I used my trusty hot glue gun to stick the leaves and the flowers to the branch. I tried to arrange the leaves first in small clusters and then put the flowers where I thought they looked good. I didn't really have any rhyme or reason to this part, I just stuck them on however. 


5. To hang the mobile I bought some of the small hooks that have thread on one end so that I could screw them in. I used two screw/hooks, drilled small pilot holes in the branch, and strategically placed them behind some leaves so they were hidden. I then used some clear fishing line to hang it from some more hooks in the ceiling. 


I haven't been happy with any of my attempts at making a bird yet, but I think that I'll keep trying. I do like it even without a bird, I like how the white stands out against the brown wall, and I like the color that the green leaves bring to that side of Baby Girl's room. 

-Mandi


Wednesday, June 13, 2012

Sweet Shoppe


Sometimes I get crazy ideas for projects that turn me into a crazy person trying to finish them. A couple of weeks ago, I decided to try and make a felt food sweet shoppe for Little Bug's birthday. I started out fine, but as usual, I got a little bit carried away with what I was trying to accomplish, and was cramming at the last minute to try and get everything done.

It started out with a free shelf that I got. It is one that was meant to go above a toilet in a bathroom, but after I painted it, I had been moving it around trying to find the perfect use for it. So, it became the base for the sweet shoppe. I just need to add a back to it. I had some leftover beadboard from another project, so I just cut it to size and nailed it to the back.


There are so many cool resources for felt food. I found many free tutorials and patterns which I used to make cakes, cookies, cupcakes, and many other desserts. I also did some winging it, and made some things up on my own. I also bought a couple of patterns from some Etsy shops, when I got too frustrated trying to figure things out on my own. 

This is what I ended up with: 

A chocolate cake with raspberries. 

A strawberry cake. 

Some sugar cookies.

Three swiss cake rolls.

Three lollipops. (It's funny, because I totally made these up at the last minute. They turned out ok, but not great and they are her very favorite thing. I have to remind her that she shouldn't really lick them.)


I wanted a cute way to display all of the desserts, so I made some wood cake and cupcake stands using supplies from Michaels. For the sweet shoppe sign, I cut a piece of foam core board that I had down to the size that I wanted. I cute the banner out of scrapbook paper and Modge Podged it onto the board. Then I used my vinyl cutter to cut out the letters for the sign.


Can I just say that I love felt/fleece food. I ended up using both fleece and felt for this project. It is really forgiving, easy to work with, and it looks pretty real too. Once I got into the swing of things, it didn't take too long to make everything. Some of the details like the shell border, the sprinkles on the cookies, etc. did take a long time, but I think that they were worth it. 

Here are some great links to tutorials and patterns that I found helpful. The patterns that I bought were from Etsy, which is also a great source for ideas. I loved just looking through all of the felt food to try and get ideas, or to figure out how to make something that I wanted for my sweet shoppe.

Feed Dog - This is where I got the swiss cake roll pattern.

Fairy Fox- This blog has many free tutorials as well as patterns for sale. 

Pink Tea- She has a brownie and a sugar cookie tutorial. I used this as a guide for my brownies.

Bugga Bugs Shop- This is the pattern that I used to make the cakes.


There were other ideas and tutorials out there that I didn't get to yet. I had a couple of failed cupcake attempts, but I will keep trying. I figure that is the beauty of this gift, I can keep adding to it over the years as I get new ideas. 

-Mandi

Linking to:

The 36th AVENUE
Photobucket

Sunday, June 10, 2012

Thinking Outside of the Box


For as simple as we kept the celebration part of Little Bug's birthday, we definitely got caught up in some bigger projects for her presents. She loves to play out in the dirt, digging for buried treasure, making mountains, and many other games. We have been wanting to build a sandbox for her, and decided that her birthday would be the perfect deadline for trying to get it done.


We have a fun little playhouse in our back yard, and decided that to the side of it would be a good place for the sandbox. The playhouse provided support on one side, the sidewalk on another, and we figured that the dirt we dug out on the backside would provide support on the third side. Oh yeah, that is the other thing about this location, it ended up being a triangle instead of a square. It worked out really well though, because it keeps the kid areas of the yard somewhat together, and was an easy solution for keeping the weeds down around the playhouse. Once we decided on a location, Jared went to work digging out the dirt.


We debated about what to use for the sides of the sandbox. We wanted something affordable and that would weather well. After pricing out treated wood and Trex material, we figured that it would cost us between $100 and $150 to build it. We thought we could do better though. What we ended up using was vinyl fence pieces. We were able to buy scratch-and-dent pieces vinyl fence pieces from a vinyl fence company for around $20. The final size ended up being about 96 x 96 x 70".


Vinyl is actually fairly easy to work with. We used our compound miter saw to cut the pieces to the lengths that we wanted, and then used a Roto-Zip to cut out slots in the fence posts for the side pieces to slide into. Because we needed a triangle shape, the vinyl was perfect because we could turn the posts to angle them the direction that we needed.


We debated about lining the bottom in something hard, but Jared dug down far enough that the ground was very hard. We opted for lining it with a weed barrier instead, and then just put the sand on top of that. To keep the neighborhood cats out of it, we do keep it covered with a piece of vinyl lattice when it is not in use.


I think that it worked out well. As usual, it is far from perfect, but it looks nice and Little Bug loves it. It is hard to make her come inside when she is out there playing. Now my only worry is dealing with sand all over the house all summer.

-Mandi

Thursday, June 7, 2012

C's Room Part 3- Project Center


C likes to create. He always has a project going. His latest was creating a book to give his cute niece for her third birthday. As we redid C's room we wanted to make a place for his projects and the space under his bed seemed the ideal spot.


We gave his old desk a facelift (paint and handles) and picked up a second hand chair for a few dollars. Isn't it funny that it took seeing this picture to realize that we need to lower the chair. He has been using this for months without us noticing that his legs don't fit under the desk and he never said anything about it either.


C needed a place to keep his markers, colored pencils, crayons, etc. The hooks and buckets came from Lowes. We screwed the hooks right into the board that bolts the bed to the wall. The buckets were perfect. They were the color we wanted and came with a hole in the top making it easy to hang them.


This art station has been a great place for C to work on projects. The only drawback is that the bed makes for a low ceiling over the work space. There have been a couple of times when C has forgotten and gained a bruised head

Joanne

Linking to:


katherines corner 

Tuesday, June 5, 2012

Thrifting in Grandma's Basement

A couple weeks ago, I went thrift store shopping in my favorite place. My Grandmother's basement. I was looking through boxes of 40 year old junk when I came across a treasure, my Great-granmother's old typewriter. Totally manual, no electricity involved. It had all the charm of the 1970's and it still worked. Well, all except for the "H" key.

So I took it home and spent 2 hours taking it apart  cleaning off 40 years of dust. I also managed to fix the "H" key. I was so stoked that it didn't even faze me when my husband came home from work gave me an eye roll and said, "That's another 18 inches of space for junk in our house." I had faith in that little typewriter to prove him wrong.
I took a trip to Office Depot and bought an typewriter ribbon for $6. And I typed. I typed a letter to my brother in Florida. I typed a post card we picked up in Yosemite but never sent. I typed cards. I typed tags.
And it was awesome! When my husband came home even he was won over by the imperfections and charm of the old not-so-accurate-anymore typewriter. He sat down to type a letter to his niece in New Mexico.

So go take a look around your Grandmother's basement, you never know what treasure you might find.

-Michelle

Monday, June 4, 2012

Birthday

I don't know where the past 3 years have gone. My little girl is definitely not a baby anymore. I am amazed with how much she knows, how great her personality is, and how much I love her. She has beautiful brown eyes, a contagious smile, and she is my best little buddy. Her birthday this year was extra fun because she actually knew what was going on and was really excited for it.


We decided to keep things simple this year. I made a birthday banner for her first birthday that I still really like, which I hung that up in the kitchen. It was super easy to make. I wanted a pennant type banner, so I cut triangles out of cute scrapbook paper. Because we had just moved in our house, my vinyl cutter wasn't set up yet, so I printed out letters in a font that I liked, traced them onto the leftover scrapbook paper, and then glued them onto the triangles. To make it really easy, I stapled the triangles to a piece of ribbon, and had a cute birthday banner that has actually held up really well.


I have seen so many cool cakes online, and really wanted to make one in the shape of a number three. Lucky for me, the week before her birthday, I saw this one on Pinterest and from reading the blog, knew how to tackle it. That cake was completely covered in M&M's, which I wasn't sure if I wanted to try or not, but I showed the cake to Little Bug and she said that she definitely wanted the M&M cake. I baked two bundt cakes using this recipe, and then cut out the parts that I didn't want and arranged them into a three shape. I frosted it with chocolate buttercream frosting, and after getting the first few rows of M&M's on, decided that it was way too tedious putting them on. So, I opted to have rainbow stripes instead, which I actually really like the way that it turned out. It tasted good too, and we didn't even have any leftovers.


We spent an evening at a park, eating cake and ice cream, playing, and hanging out with family. The weather was perfect, the company was fantastic, and it was a really nice day.

-Mandi
Related Posts Plugin for WordPress, Blogger...