Tuesday, July 24, 2012

Balloon Rockets

I am officially the biggest slacker in the blogging world. It has been over a month since my last post and for that I apologize. Between birthdays, family parties, vacations, and holidays my summer has flown by. I will try do better and not wait so long for my next post.


At the end of June we decided to have my little brother and cousin come up and stay with us. I wanted to do something fun and active and decided that making balloon rockets would be a great and cheap way to keep all of us entertained for a couple of hours. These rockets can be made just using things found around the house.

Materials:
Paper (Any kind works. It's fun to let kids experiment and see what works best.)
Straws
Masking Tape
String
Markers
Scissors

Making the rocket is super simple. There is no right or wrong way to do it, and as I mentioned before it's a good opportunity to let kids use their imaginations and figure out which rocket design will do best. There are only two things these rockets really need. The first thing is a body, we made the body by rolling paper and taping it so it would stay rolled. The only other critical piece is a straw taped on the top. We found out the longer the straw the better the rocket flew. When we used small straws the rocket really struggled and would get caught on the string. After the rocket has a body and a string everything else is really just decoration.


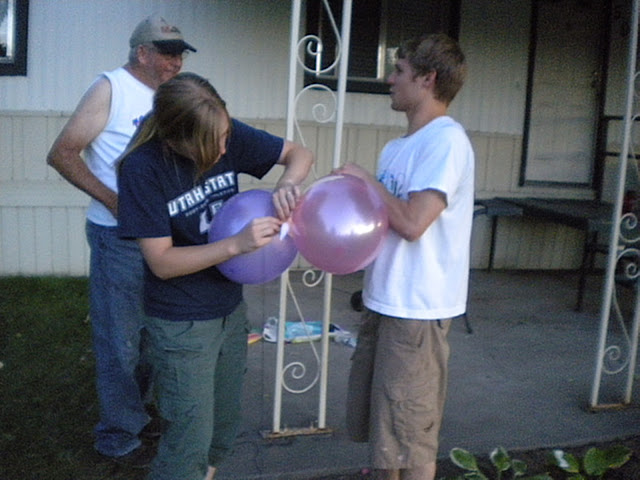
Having fun making the rockets.


When the rockets are finished it's time to attach the "fuel" or balloon to the bottom of them. We found that the easiest way to do this is to blow up the balloon (DON'T TIE) and while it is blown up attach it to the rocket using two pieces of masking tape. Be generous with the length of the tape, it should have one end go over the body of the rocket and the other end a good ways down the balloon. The end of the balloon where it is blown up should face the rear of the rocket (see top picture to help with placement of balloon).


After the rockets are ready to go find a place to "launch" the rockets. We tied the string between our light post and front porch. It was roughly thirty feet. I would recommend only tying down one end of the string and leave the other string untied so it's easy to take rockets on and off the string. When the rocket is on the string make sure to hold the string tight so it does not have any give to it (this will help the rockets to travel better). To attach the rockets put the string through the straw attached to the top of the rocket. I would recommend blowing up the balloon before attaching it to the string (make sure to not tie the balloon). When ready to launch count down and simply let go of the balloon. It should travel quickly down the length of the string. It's fun to have contests to see whose will travel the farthest. 


The rocket does spin sometimes while in flight, hence the balloon on the top of the rocket.


The rocket in flight.


David and I decided to have some fun and try a double ballooned rocket. We were disappointed when it didn't do much different than a rocket with one balloon.

This is a super simple, cheap, and fun activity. We thought it would be a good way to keep the kids entertained for a little while, but it ended up keeping us all happy for most of the evening. We even had some neighbor kids come over and join in the fun. They made rockets up in a couple of minutes and were launching them right along with us. This is a great activity to get kids off the couch and using their imaginations. 

-Nicole

Thursday, July 12, 2012

Ruffled Lamp

There hasn't been much to post the past couple of weeks. Life has been busy and even though I have still been working on things here and there, it has been one of those lulls in my creativity. I have had a couple of project flops, or haven't been able to complete projects to the point where I want to post them. But then last night I had an idea of something that I could work on today. The stars aligned, I was able to run the errands I needed for supplies, I ignored my messy kitchen, and my project actually worked out, so here is the rundown. 

I had wanted to find a drum lamp shade for the lamp in Baby Girl's room, but I didn't really want to pay $15 for it, which is what I had found it for. About a month ago at a thrift store, I found this shade. 


For the $2 price tag, I was more than willing to look past the design because I already knew what I wanted to do with it. Bug was sad that I wanted to cover it because she really liked the stars on it, but I convinced her that I could make it even more fancy, so she said I could cover it. I had seen a cool tutorial on The 36th Avenue where Desiree had covered a lampshade in variegated yarn to create a striped look. I loved it and wanted to try it.


My attempt was not my favorite. Part of it could have been the lamp. Maybe if I had a bulkier lamp, I would have liked the shade better, but I was frustrated that it didn't turn out and so it just sat for a month.


Then last night I had an epiphany. I found an old glass and brass lamp last year for Bug's room. I had always intended to spray paint the brass part white, but ended up really liking the vintage feel that the lamp had. So, I decided to try and see if I could find a similar lamp and cover the shade in something besides the yarn. I found this little lamp for $5 today, and decided to go for Makeover Round 2. I really like the shape of the lamp and the glass part, but it was just a little bit too shiny brassy for me. I still wanted a brassy look, so instead of painting it, I decided to use glaze instead.


I lightly sanded to try and get the glaze to adhere better, and then wiped it down.


I ended up using a combination of these two glazes. I loved the gold one, but it was just a little bit too subtle on its own. Combined with the antiquing glaze, it worked perfectly to tone down the brass, but still leave the vintage feel. 


This is what it looked like after two coats of glaze.


I actually chose something more "girly" than I normally would for the lamp shade. I bought pre-ruffled satin ribbon and glued it on in layers. I asked Bug what she thought of it, and she told me that it looked like a "swirly twirly princess dress," which is a huge compliment coming from her.


This is what it looks like in the nursery. I am really happy with how it turned out. I like the size and shape of this lamp better than the one that used to be there. It is also another project to cross off the list for updating the nursery for Baby Girl. I am hoping that my project rut is over and that this lamp turning out today is the start of another streak of successful projects. I guess I can hope. :)

-Mandi


Linking here to:


Photobucket


Related Posts Plugin for WordPress, Blogger...