Borrowing some inspiration from Pinterest and my need to branch out and make some friends in my neighborhood, I decided to host a soup exchange night. I like entertaining and have fun planning the menu, getting the house ready, etc. For soup night, the menu included Zuppa Toscana (recipe from here), salad, bread, and cupcakes for dessert. My day went fairly smoothly, my girls cooperated and I felt like I was making good time accomplishing what I wanted to. Then, I pulled the cupcakes out of the oven. I could tell within 30 seconds of pulling them out that they were about 3-4 minute too well done. The perfectionist in me was ready to dump them in the garbage can right away and start over again. Especially with guests coming over I didn't want to serve them dry cake. I racked by brain trying to think of what I could do to salvage them.
Thank goodness, I had an epiphany. I had a vision of making Skor cupcakes, a variation of Skor cake which involves baking a cake, cutting it into cubes, and layering it with pudding, whipped cream, and Skor bits. I figured that the same thing could probably be accomplished in individual servings with cupcakes instead which would add some much needed moisture to my too dry cupcakes. I cut each cupcake in half and put the bottoms into little white mugs that I have. I then layered chocolate pudding, whipped cream and Skor bits on top of that. Then I put the tops back on and repeated all of the layers again.
They actually turned out pretty cute, and they tasted good too. Dessert saved, and problem solved.
The whole night went really well. I provided dinner for everyone, and then each person brought their own soup in individual servings so that we could exchange them. We had a good variety of soups: taco soup, chicken and vegetable soup, creamy tomato basil, and a white bean chili. Thanks to Michelle for driving through a snowstorm to come support me and hang out. We had a good time talking, laughing, eating, and now we all have lunch for the rest of the week.
-Mandi
Wednesday, February 29, 2012
Monday, February 27, 2012
Double Crochet Beanie
I decided it was time to post a pattern. The pattern I decided on is for a super easy double crocheted hat. I use this beanie as a basis for a lot of my animal hats. The pattern should make a hat to fit a two year old. This is my first pattern so if there is any confusion please comment.
Gauge: 4 Dc =11/2"
Hook Size: H/8-5.00mm
Medium Worsted Yarn #4
Abbreviations:
Ch-Chain
Slst-Slip Stitch
Dc-Double Crochet
Rnd-Round
St-Stitch
*Repeat pattern until end of round*
To start hat:
-Chain 5, Slst in 1st chain to join. (will form a ring) Ch 3
Rnd 1
-11 Dc in center of ring, Slst in top of 3rd Ch to join. Ch 3 and turn
Rnd 2
-2 Dc in next St from Ch. *Repeat until end of the rnd.* 1 Dc in last st. Slst in top of 3rd Ch to join. Ch 3 (24St, 2 1/2")
Rnd 3
-*1 Dc in next St next to Ch, 2 Dc in next St, 1 Dc in next St.* 1 Dc in last St. Slst in top of 3rd Ch to join. Ch 3 (34 St, 3 1/2")
Rnd 4
-Repeat last rnd. (50 st, 5")
Rnd 5
-*1 Dc in next 5 St from Ch, 2 Dc in next St, 1 Dc in next 5 St.* 1 Dc in last St. Slst in top of 3rd Ch to join. Ch 3 (58 st, 5 3/4")
-Nicole
Gauge: 4 Dc =11/2"
Hook Size: H/8-5.00mm
Medium Worsted Yarn #4
Abbreviations:
Ch-Chain
Slst-Slip Stitch
Dc-Double Crochet
Rnd-Round
St-Stitch
*Repeat pattern until end of round*
To start hat:
-Chain 5, Slst in 1st chain to join. (will form a ring) Ch 3
Rnd 1
-11 Dc in center of ring, Slst in top of 3rd Ch to join. Ch 3 and turn
| This is the very top of the hat. The next few rounds will be widening the hat. |
Rnd 2
-2 Dc in next St from Ch. *Repeat until end of the rnd.* 1 Dc in last st. Slst in top of 3rd Ch to join. Ch 3 (24St, 2 1/2")
Rnd 3
-*1 Dc in next St next to Ch, 2 Dc in next St, 1 Dc in next St.* 1 Dc in last St. Slst in top of 3rd Ch to join. Ch 3 (34 St, 3 1/2")
Rnd 4
-Repeat last rnd. (50 st, 5")
Rnd 5
-*1 Dc in next 5 St from Ch, 2 Dc in next St, 1 Dc in next 5 St.* 1 Dc in last St. Slst in top of 3rd Ch to join. Ch 3 (58 st, 5 3/4")
| At this point the beanie will resemble a plate. Don't worry the next rounds it will start to work its way down. |
Rnd 6
-1 Dc in St next to Ch. 1 Dc in each remaining St until end of rnd. Slst in top of 3rd Ch to join. Ch 3
| By doing just 1 Dc in each stitch the hat should no longer get bigger. It should just go straight down. |
Rnd 7-12
-Repeat last rnd to finish hat.
To finish hat:
-At the end of rnd 12 slst to 3rd Ch. Pull yarn through until there is a loop about 4" long. Cut yarn at top of loop and pull yarn still connected to the skein out of loop. Take the loose end attached to the hat and tie a knot in it as close to the hat as possible. Then take the yarn and weave it back through the hat.
| Finished hat |
As I said before this is the base for my animal beanies. These hats are cute alone or things can be added to them.
| My black bear and dog. |
Saturday, February 25, 2012
Let It Be- a DIY guide to failing every now and again
I came across a Woody Allen quote once and it has stuck with me.
"If you're not failing every now and again, it's a sign you're not doing anything very innovative."
Well on my last project "innovation" was my middle name, because it was definitely a swing and a miss. Let me start at the beginning...
Last summer Ben and I were on vacation at his uncle's summer home. We were in one of the local shops and found a window for sale that had been salvaged from an old barn. So we bought it for $20 and took it home with visions of a glorious DIY project dancing in our heads.
Now last month I found that old window (I'm a procrastinator, remember?) and painted the frame a lovely pea green color (I know what you are thinking, but the color of the frame is NOT where this project went awry).
Armed with confidence from the successful paint job, I boldly charged on to step 2. Throwing caution to the wind I decided to try something new...unique...creative even. And that my friends, is where our tragedy begins.
It all began, with 3 little words- LET IT BE.
I know it seems innocent enough. But those three words were my downfall with this project. There just so happened to be 3 panes in this window, so of course I thought I'd get fancy and use some vinyl lettering as stencils, stick one of the words Let it Be in each panel, paint the negative spaces with some acrylic paint, and BAM! A DIY project worthy of the Hall of Fame.
Let's just say reality didn't even come close. From the color palette I mixed up to the method of painting, it was a disaster. In my mind I'd pictured something unique, simple and cool. But the end product was a horrible camouflage type look that even the bravest of hunters wouldn't touch with a 10ft pole.
Well, let's just say there was a clean up on aisle innovation. It took me three quarters of a bottle of fingernail polish remover and about a gazillion paper towels, but I am now back to a blank canvas on my DIY Hall of Fame project.
And guess what? Before there was Woody Allen there was Thomas Edison, and it took him 1,000 tries before he invented the light bulb.
He said, "Many of life's failures are people who did not realize how close they were to success when they gave up."
So I suppose I can't throw in the towel just yet. Maybe the Hall of Fame is still within reach. Stay tuned for take 2.
-Michelle
Thursday, February 23, 2012
Toddler Closet Organization
Like many of you, I sometimes have a love/hate relationship with Pinterest. I love the inspiration and the good ideas that can come from it, but sometimes it makes me jealous of all of the gorgeous, well-organized homes that are out there. I pinned a few really nice children's closets to my pinboard, and I'll admit that I was feeling some closet envy. I wanted to come up with a cute way to keep Johana's closet organized, but didn't have money to buy cute containers or extravagant shelving systems. One thing that we seem to have an excess of is cardboard boxes. Between shopping at Costco and ordering things from Amazon I feel like I am always breaking down boxes for the recycle bin. There have been a few tutorials popping up here and there for covering diaper boxes in fabric to make them more attractive, which I considered, but I still didn't want to spend the money it would take to buy the fabric.
My more frugal solution was to cover the boxes in paper. Around Christmas, I bought a roll of shiny white newsprint from a local newspaper office. I paid $5 for it, and I don't know how much was on it, but it was enough to wrap all of my Christmas presents and to cover 8 boxes and counting. I just measured the sides of the boxes, used my rotary cutter and cutting mat to cut rectangles that were 2 inches wider and longer than the box sides, and glued them on with spray adhesive. I pretty much wrapped them like a present, except that I used separate pieces of paper instead of just one.
To add some visual interest, I used scrapbook paper so cover the sides leaving a few inches of the white showing at the top. I bought a pack of patterned paper with a 40% off coupon, and since it was 12x12 sheets, I cut it into 6 inch strips. I used the same spray adhesive to attach the scrapbook paper, and on some of the long sides had to piece it together. You can only tell if you look really closely though. I was out of Modge Podge when I made all of these boxes, but I think that I will go over the scrapbook paper with Modge Podge to make it a little bit more durable.
To get more vertical storage, I wanted to do shelves. I considered doing something built-in, but since the plan is to eventually move baby sister in here someday and our storage needs may change, I opted to use the $15 Wal-Mart bookshelves instead. The blue baskets came from Dollar Tree and help to keep the smaller toys somewhat sorted. Cleaning up with a two-year old is easier when you can just throw everything in a basket, hence the stacking crates. Most of her toys are just thrown in there to make clean up easier.
-Mandi
Linking to:
Wednesday, February 22, 2012
Fireplace Makeover
About a year and a half ago we bought our first home. It is an older home and needed some updating. We started out gung-ho painting the whole upstairs, ripping up all the carpet, and some of the flooring in the kitchen. After all of that, the fireplace was next on the list.
Linking to:
/>
I had an idea of what I wanted but it lacked details. I looked at some images of fireplaces online and Mandi emailed me some links to blogs that she liked. From the links I found the details I needed. The inspiration came from Theletteredcottage. Her blog has awesome step by step instructions of their fireplace makeover. Now that I had an example it was time to set the makeover in motion and get my husband for assistance (aka tell him what I wanted and set him to work).
First we took out the front glass cover and the fake logs.
Then I painted the inside of the fireplace.
Then my husband started the design process. We used flat wood boards for the backing and 1 x 2's to make the squares. We used liquid nails for the backing boards and a nail gun to attach the boards for the squares.
Next, we put a 1 x 12 all the way across to make the top. Then we bought a 6 ft piece of crown molding and used that as our mantle section above the actual fireplace. We also used a small piece of decorative trim to cover the outside edge of the top board.Then we added book shelves to each side.
The bottom bench part of the fireplace was the trickiest. We had to encase the old brick and stone step. So we ended up cutting strips of wood and doing a kind of paneling pattern.
This is the finished product. Turns out that designing as we went worked best for us. We really enjoy it. It makes our front room more cozy, and yes that is a plant in my fireplace. Even though it turned out great, there are some things we would do differently.
Things we would do differently...The bottom bench part of the fireplace was the trickiest. We had to encase the old brick and stone step. So we ended up cutting strips of wood and doing a kind of paneling pattern.
- Caulk before we painted.
- Apply some type of sealant or finish at the very end.
- Use fire retardant paint when painting the inside of the fireplace.
-Jackie
Linking to:
Tuesday, February 21, 2012
DIY Custom Rubik's Cube
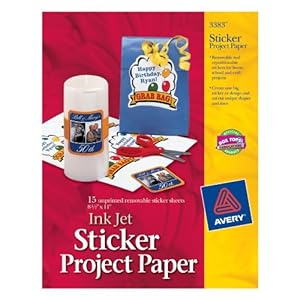
My husband has wanted a custom Rubik's Cube for quite a while now. I thought about using vinyl and using en exacto knife to cut through the pieces so that they would fit on the individual squares. Then, I found custom sticker sets on the Rubik's cube website. They are pretty reasonably priced, around $6 for a kit that will make 10 customized cubes. From reading on the website, it sounded like there was a bit of a learning curve for getting the stickers to print correctly, so I thought that it might be easier to just print my own pictures on sticker paper that I already had.
I was able to download a template from the Rubik's cube website, which is a Microsoft Word document. I tried bringing the photos that I wanted directly into Word, but it was too frustrating for me to size the pictures the way I wanted to, so I saved the template as a PDF and opened it in Photoshop instead. I chose the six pictures that I wanted, cropped them to about 2.2"x2.2", and laid them across the template. There was enough space to do six more underneath, but since I only needed enough for one cube, I just left it blank.
This is what the template looked like with the pictures in it:
Of course I didn't get pictures of all of the sides before it was scrambled, but here a couple more scrambled pictures of the other sides:
I think that Jared has had fun trying to solve this. It is a little bit more challenging than a solid color Rubik's cube, so I am excited for him to be able to put it back together.
-Mandi
Monday, February 20, 2012
Puffy Snowmen
I was looking on Pinterest for a fun art project to do with my
son’s first grade class when I came across a post for a puffy snowman from Alison
at Oopsey Daisy who got it from Jadi at Homemaking Fun who saw it on Krafty Kid. Where, or if, it was posted before that I have no idea but this was just what I was looking
for.
![]() |
My Samples |
First I have to say that a project with both shaving cream
and white glue is a recipe for trouble in a class with 21 first graders. When I
discussed this with the teacher, Mrs S, I came with a tamer neater “Plan B project “ also as a backup. Mrs S. is great though and she was all for these snowmen.
This is how we did this project...
First, before class, I cut black hats and orange triangles from paper scraps and strips from leftover fleece scraps. I tied a knot and cut fringe in one end of each strip. This didn't take long since 4-5 of each were cut at a time.
The snow was made with equal parts of shaving cream and white glue. Hint: To judge what equal is, use a container you can see through... like a clear plastic cup, a glass mixing bowl, etc. For the class I used empty ice cream buckets. This makes it easier to see how much space the glue takes and double that for the shaving cream. Not an exact science but it worked. Fold the shaving cream into the glue.
In class the kids creased the hats between the top and the brim to give them more dimension.
They twisted the orange triangles into "carrots" and cut or tore paper for eyes, buttons and other parts.
Then came time to play in the snow. First they used a scrap paper and had fun with the texture and feel of glue and shaving cream mix.
Then each of them were given a piece of blue mat board so they could create their snowmen. These were scraps leftover from mats cut for paintings. Most frame shops have lots of mat scraps that they usually just throw away.
Here are some of their wonderful creations...
-Joanne
Subscribe to:
Posts (Atom)