Wednesday, August 29, 2012

Stuff

Sometimes I think that I can see potential in almost anything, especially in things that are free or a really good deal. This can be a good thing, particularly when trying to furnish and decorate a house with limited funds, but it also leads to the accumulation of a bunch of stuff. We haven't even parked in our garage in the 2 years that we have lived here because it has project after project being stored out there.

When I brought home two large sets of bench drawers, I knew that I needed to get to them quickly so that they weren't just adding to the chaos.


I knew exactly what I wanted one set for, and I figured that since they were free, I could easily find another use for the other set. They were in ok shape, even though one set had a little bit of mold. I didn't know that until I got them home, but with some bleach water and some sanding, I got all of it off fairly easily and fairly quickly. 


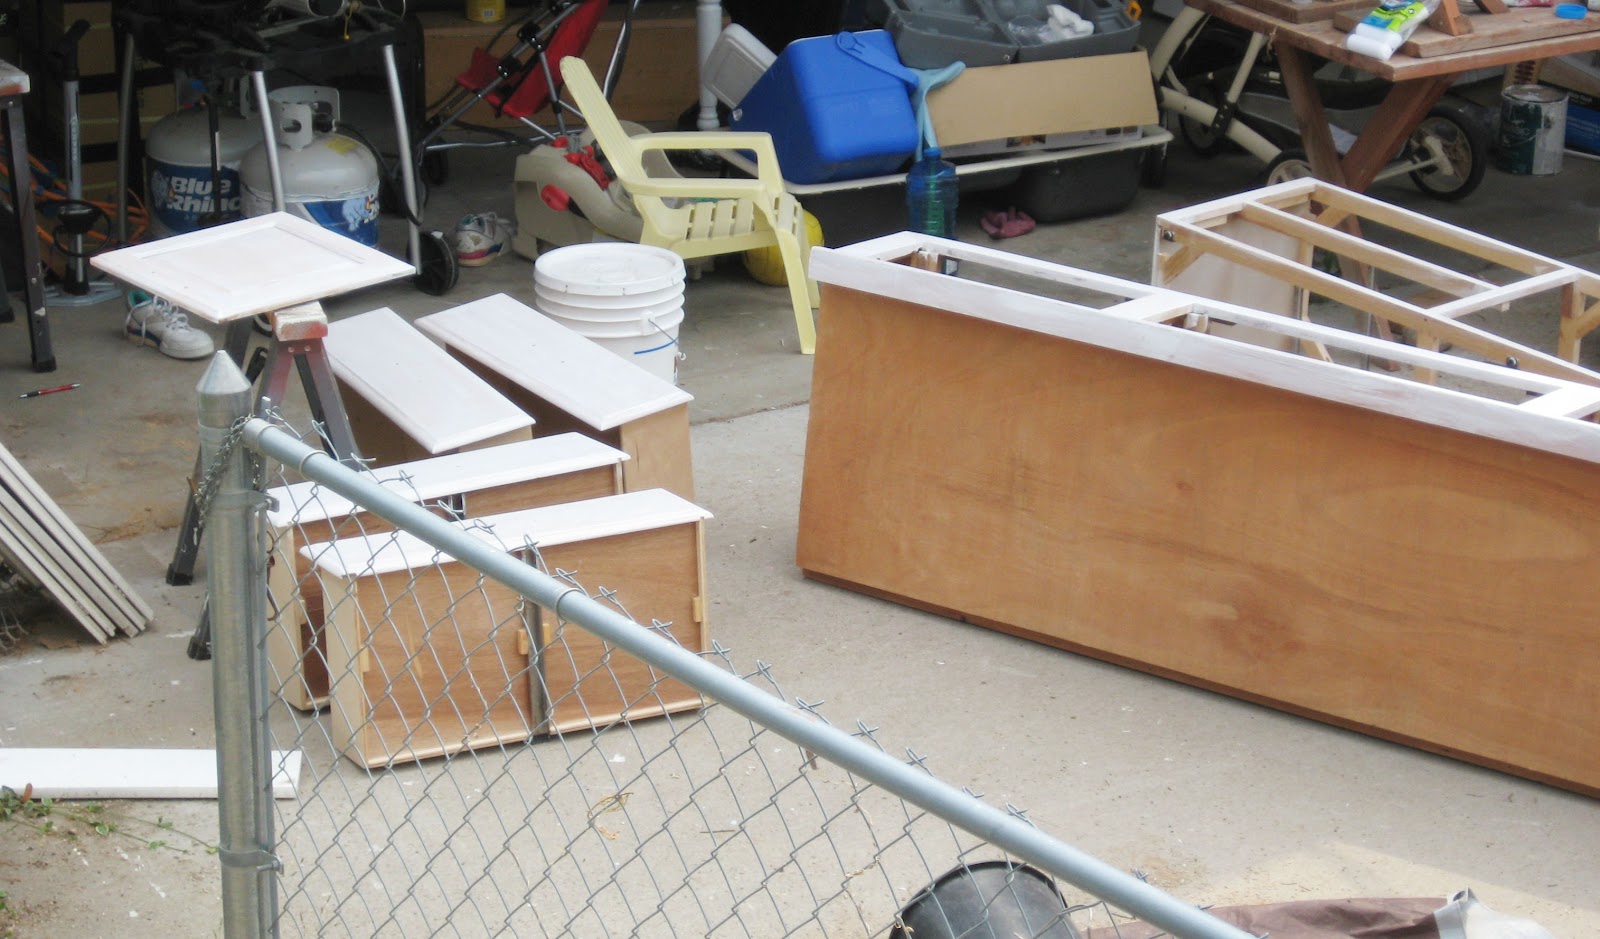
After a light sanding and wiping down to disinfect them, I did the usual priming and two coats of paint. 


I really wanted one set of the drawers to fit under Bug's big girl bed. I knew that they were a little bit too long for the space, but I was hoping that it wouldn't be too noticeable. Of course, it was way too noticeable. It pushed the sides of her bed out at a really strange angle. Don't worry though, I pulled out my trusty jigsaw, and cut about 2 inches off of each side of the drawer frame. 


My straight cutting skills are somewhat lacking, and I think that it would have been pretty hard to cut straight anyway, so the edges are a little big jagged. I think that I am going to put a little piece of trim there to hide that part, but haven't done it yet.


And here it what the drawers look like under the bed. I really like the way that they fit there. It is nice too, because it was just dead space before, collecting dust and toys. I happened upon the bed last year at a local thrift store and it was only $25, way too good to pass up.

Now there is a drawer for extra blankets,


a drawer for grow-into-clothes,


and a drawer for the toys that Bug doesn't want little sister to get to.


I have loved the bed ever since we put it in the room. I had thought about trying to build some drawers to go under it, but I think that this turned out better than I could have done from scratch.


It is hard to tell that the drawers didn't come with the bed. If I ever get the trim to hide the cut lines, it will be even harder to tell. Definitely worth the $25 and the labor that I put into it.

Yeah, so there is one more project done and one more large piece of furniture out of the garage.

-Mandi

Saturday, August 25, 2012

Book Storage


Sometimes it takes me a long time to get something "finished." The reading nook in Little Bug's room has pretty much been finished for months now except that I wanted a good way to store her books. I have been using baskets to store them, but as she has accumulated more books over the years, they no longer fit in just one basket, not to mention they got way too heavy and the baskets ended up looking like this:


Little girls are surprisingly hard on things, and baskets weren't cutting it, so I decided to try something new. I had seen some cool tutorials about using rope wrapped around containers to give it a basket or Pottery Barn look, so I went shopping. 


I found this large Sterlite container at a thrift store for $2. It didn't have a lid, but I didn't need one, so I bought it anyway. I bought a 50ft roll of sisal rope at Lowes for $9, and I was set to go. The problem here, that one roll of rope was not going to be enough, and buying another roll didn't really equal out to be an inexpensive storage solution like I wanted it to be. This is about 6 rows wrapped around the container and I only had 1/3 or so of the roll left. It would have probably taken me at least 3 rolls to cover the whole thing. 


So, I moved on to my next idea. I remembered seeing an idea here for a fabric covered plastic storage bin. I already had some canvas on hand from another project, so I set to work. I used Modge Podge to stick it to the sides of the container, and left enough of an overhang to fold over to the bottom. It was fairly easy and took about 30 minutes. I also used some cute fabric that I had on hand to create a faux liner for the bin. It is durable, looks cute under the nook bench, and holds a lot of books.


The other thing that I have debated about doing in the nook for a long time was adding shelves for books along the sides. It is a pretty cozy space, so I knew that the shelves would have to be pretty low profile. Yesterday, I finally decided to just go for it, and I really like how they turned out. When I first made the reading nook, there were a couple of shelve that I removed to make room for the bench. The supports for those shelves were still there, so I just screwed a narrow piece of wood onto the bottom of the supports, and then added an even smaller piece of wood to create a lip. I painted them green to match her room, and they were ready to add books. 


I really like the way that they turned out. They are only about 4 inched wide, so they don't take up too much space. Since I was able to use scrap wood that we had laying around to make them, they were also free, and took about 2 hours to build, paint, and install. 


Bug likes her new shelves. She has already changed out the books several times, and likes that all of the rest of her books now fit into one basket. And now, except for maybe rearranging the upper shelves, I can say that I have officially finished the reading nook.

-Mandi

Monday, August 20, 2012

Zion's Market

In my neighborhood, every couple of years, there is a cool event held called Zion's Market. It is organized by the Relief Society in my ward and the other two wards that share our church building. On the Friday before the market, everyone can bring their donations, anything that they were going to donate to thrift stores or sell at garage sales. Pretty much anything in good useable condition goes. It is a pretty big undertaking, but there are many volunteers at the church to sort through what everyone brings, organizing into different categories. Then, on Saturday, the neighborhood is invited to go shopping. There is no money exchanged, everyone can just go and take what they need. It is fun to go thrifting without having to spend any money, and at the end whatever hasn't been taken by people at the market is loaded into a trailer and donated to a local thrift store. It is also neat to see how some people's junk can become another person's treasure.

Here are a some of the things that I was able to get at Zion's Market:


These two cane back chairs. I spray painted them black and covered the seats with some canvas, but I think that I may change them up a little bit more.


This awesome lantern. It was brass color when I got it, but I was able to take it apart and spray paint it oil rubbed bronze. It now provides some much needed light in my craft room.


This cool retro bag.


Some canvas fabric and some satin fabric. I have plans to make some canvas storage bins and some cute polka dot skirts for my girls.


A pile of clothes for each of my girls.


These were two sets of drawers that I think were part of a queen-sized bed. I took them with a few ideas of some places that I could use them in my house, and I have been working on painting and retro-fitting them. They will be in two future posts very soon. I had to work on them quickly because they were taking up valuable driveway space.

-Mandi

Tuesday, July 24, 2012

Balloon Rockets

I am officially the biggest slacker in the blogging world. It has been over a month since my last post and for that I apologize. Between birthdays, family parties, vacations, and holidays my summer has flown by. I will try do better and not wait so long for my next post.


At the end of June we decided to have my little brother and cousin come up and stay with us. I wanted to do something fun and active and decided that making balloon rockets would be a great and cheap way to keep all of us entertained for a couple of hours. These rockets can be made just using things found around the house.

Materials:
Paper (Any kind works. It's fun to let kids experiment and see what works best.)
Straws
Masking Tape
String
Markers
Scissors

Making the rocket is super simple. There is no right or wrong way to do it, and as I mentioned before it's a good opportunity to let kids use their imaginations and figure out which rocket design will do best. There are only two things these rockets really need. The first thing is a body, we made the body by rolling paper and taping it so it would stay rolled. The only other critical piece is a straw taped on the top. We found out the longer the straw the better the rocket flew. When we used small straws the rocket really struggled and would get caught on the string. After the rocket has a body and a string everything else is really just decoration.


Having fun making the rockets.


When the rockets are finished it's time to attach the "fuel" or balloon to the bottom of them. We found that the easiest way to do this is to blow up the balloon (DON'T TIE) and while it is blown up attach it to the rocket using two pieces of masking tape. Be generous with the length of the tape, it should have one end go over the body of the rocket and the other end a good ways down the balloon. The end of the balloon where it is blown up should face the rear of the rocket (see top picture to help with placement of balloon).


After the rockets are ready to go find a place to "launch" the rockets. We tied the string between our light post and front porch. It was roughly thirty feet. I would recommend only tying down one end of the string and leave the other string untied so it's easy to take rockets on and off the string. When the rocket is on the string make sure to hold the string tight so it does not have any give to it (this will help the rockets to travel better). To attach the rockets put the string through the straw attached to the top of the rocket. I would recommend blowing up the balloon before attaching it to the string (make sure to not tie the balloon). When ready to launch count down and simply let go of the balloon. It should travel quickly down the length of the string. It's fun to have contests to see whose will travel the farthest. 


The rocket does spin sometimes while in flight, hence the balloon on the top of the rocket.


The rocket in flight.


David and I decided to have some fun and try a double ballooned rocket. We were disappointed when it didn't do much different than a rocket with one balloon.

This is a super simple, cheap, and fun activity. We thought it would be a good way to keep the kids entertained for a little while, but it ended up keeping us all happy for most of the evening. We even had some neighbor kids come over and join in the fun. They made rockets up in a couple of minutes and were launching them right along with us. This is a great activity to get kids off the couch and using their imaginations. 

-Nicole

Thursday, July 12, 2012

Ruffled Lamp

There hasn't been much to post the past couple of weeks. Life has been busy and even though I have still been working on things here and there, it has been one of those lulls in my creativity. I have had a couple of project flops, or haven't been able to complete projects to the point where I want to post them. But then last night I had an idea of something that I could work on today. The stars aligned, I was able to run the errands I needed for supplies, I ignored my messy kitchen, and my project actually worked out, so here is the rundown. 

I had wanted to find a drum lamp shade for the lamp in Baby Girl's room, but I didn't really want to pay $15 for it, which is what I had found it for. About a month ago at a thrift store, I found this shade. 


For the $2 price tag, I was more than willing to look past the design because I already knew what I wanted to do with it. Bug was sad that I wanted to cover it because she really liked the stars on it, but I convinced her that I could make it even more fancy, so she said I could cover it. I had seen a cool tutorial on The 36th Avenue where Desiree had covered a lampshade in variegated yarn to create a striped look. I loved it and wanted to try it.


My attempt was not my favorite. Part of it could have been the lamp. Maybe if I had a bulkier lamp, I would have liked the shade better, but I was frustrated that it didn't turn out and so it just sat for a month.


Then last night I had an epiphany. I found an old glass and brass lamp last year for Bug's room. I had always intended to spray paint the brass part white, but ended up really liking the vintage feel that the lamp had. So, I decided to try and see if I could find a similar lamp and cover the shade in something besides the yarn. I found this little lamp for $5 today, and decided to go for Makeover Round 2. I really like the shape of the lamp and the glass part, but it was just a little bit too shiny brassy for me. I still wanted a brassy look, so instead of painting it, I decided to use glaze instead.


I lightly sanded to try and get the glaze to adhere better, and then wiped it down.


I ended up using a combination of these two glazes. I loved the gold one, but it was just a little bit too subtle on its own. Combined with the antiquing glaze, it worked perfectly to tone down the brass, but still leave the vintage feel. 


This is what it looked like after two coats of glaze.


I actually chose something more "girly" than I normally would for the lamp shade. I bought pre-ruffled satin ribbon and glued it on in layers. I asked Bug what she thought of it, and she told me that it looked like a "swirly twirly princess dress," which is a huge compliment coming from her.


This is what it looks like in the nursery. I am really happy with how it turned out. I like the size and shape of this lamp better than the one that used to be there. It is also another project to cross off the list for updating the nursery for Baby Girl. I am hoping that my project rut is over and that this lamp turning out today is the start of another streak of successful projects. I guess I can hope. :)

-Mandi


Linking here to:


Photobucket


Friday, June 29, 2012

Five on Friday: Things I love

Last night I finished a book that I have been reading the past few days. It reminded me how much I love to read. I haven't made it as much time for reading in my life the past few years, but when I find a good book or a good series, all I want to do is read. Anyway, thinking about how much I enjoyed this book, made me think about how much I have enjoyed some other things lately. So, instead of doing completed projects for this week, I decided to write a completely random post about some of the things that I have been loving lately. 

1. The Fable Haven Series by Brandon Mull

Link


I know that most of my siblings have read this, and I am late jumping on the bandwagon, but these are really good books. I read the first one a few years ago, but read books 2 and 3 this week and still have 4 and 5 to look forward to. I also love that all of the books are out so that you can read them one after another and not have to wait years for the next one to come out. They are children's' fantasy/adventure books, so they read quickly, and I found them very entertaining. 

2. Homemade Spinach Tortillas


I saw this recipe on Pinterest awhile back and decided to give it a try. The recipe is from here. They were really good, fairly easy, and I have even made them a couple of times since. We have eaten them with tacos, fajitas, and tostadas. 

3. 9-month olds


This is a given, that I would love my baby, but she has been so happy and so much fun lately, that I had to add her to the list. Her little smile and her funny faces make me laugh. She is crawling and into everything, putting everything into her mouth, and keeping me on my toes. She gives great hugs and slobbery kisses, and makes me so thankful that I get to be her mom. 

4. 3-year olds


Another given, I know, but my little Bug is so fun and so smart that I had to add her as well. She has not been super cooperative with pictures lately, so most of the pictures that I have are silly or extremely candid. These pictures were after I asked her to just smile and be normal. I even gave up on that and just asked her to sit still for a minute. This is what she gave me. 

5. Caribbean Workout exercise videos. 


I have not been very dedicated to losing baby weight. I am trying to get more motivated, but with two little girls it can be hard to find the time. So, I came to the conclusion that some things like running and going to the gym may not be for me right now, but I can do an exercise video even with my girls. Little Bug loves doing yoga with me and makes me laugh the whole time. I do feel better when I do them, and as soon as I get back into a regular workout schedule maybe I can start adding running and some other things back in as well. 

-Mandi

Related Posts Plugin for WordPress, Blogger...