
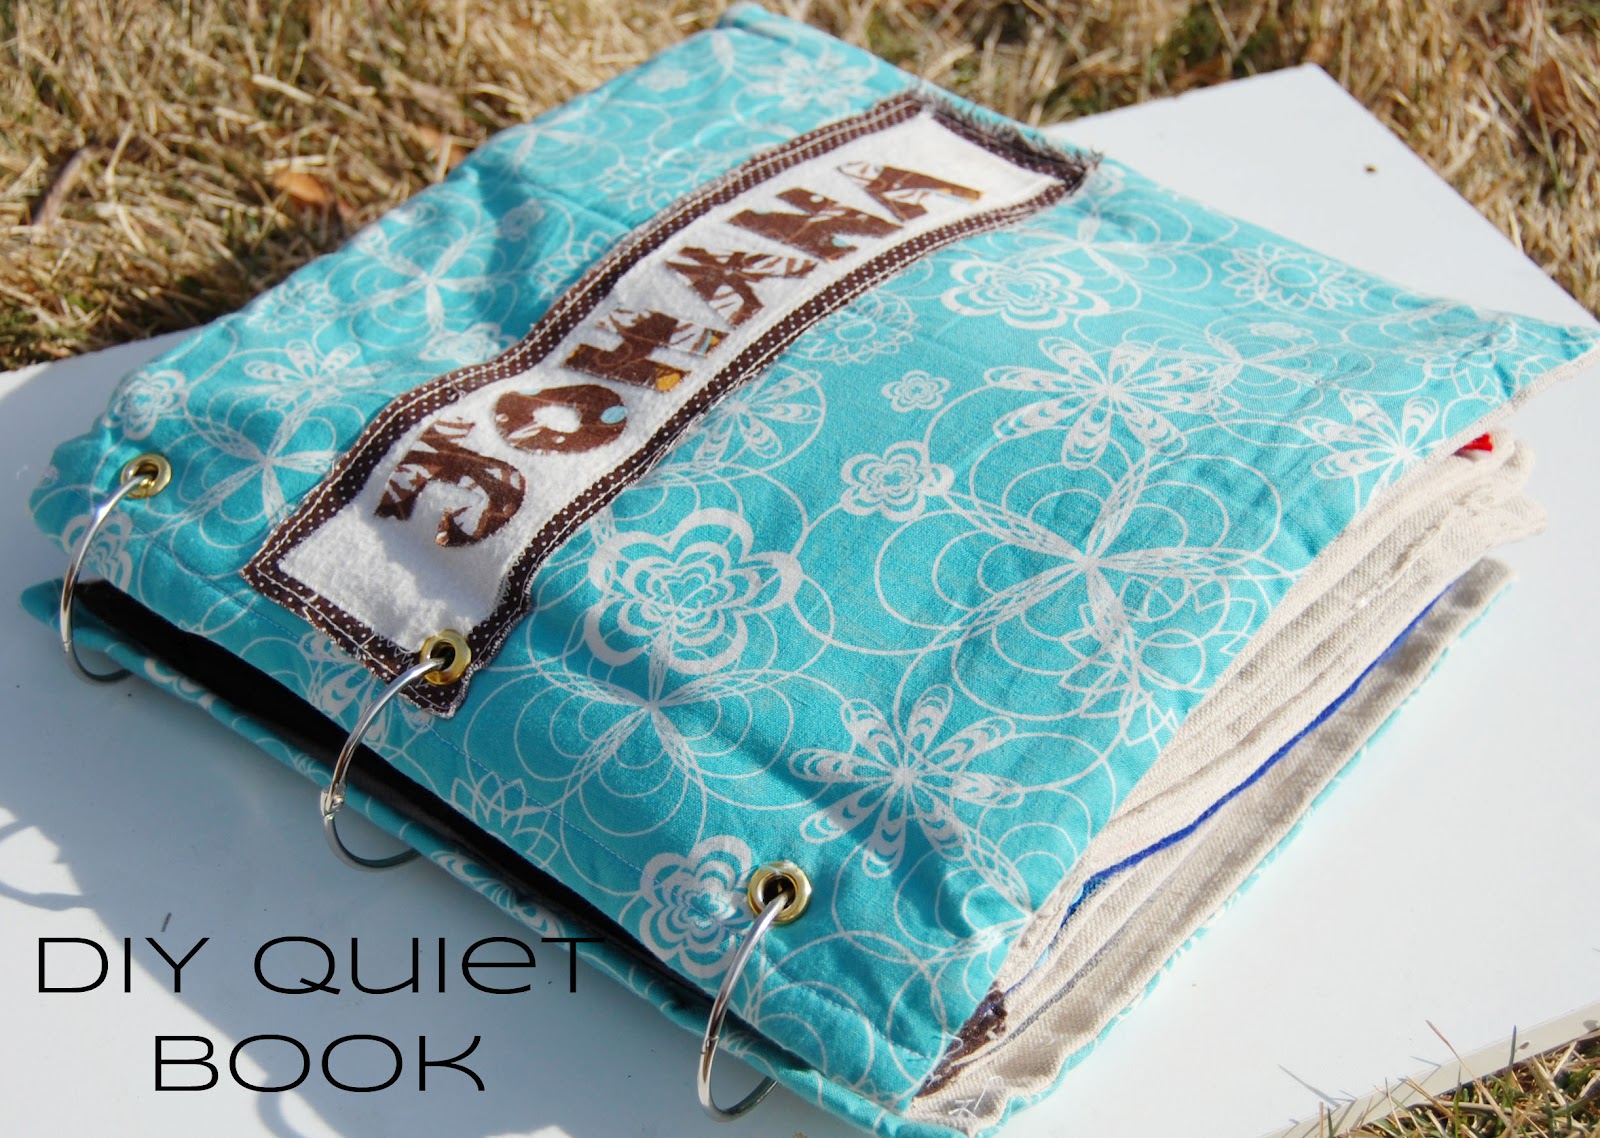
I have always wanted to make a quiet book. For a long time, I had different ideas going through my head and tried to picture the way that I wanted to do it. Before I actually started I was able to look around at some of the others that had already been made for other great ideas. It took a long time to figure out the logistics and a long time to put it all together. It was worth it though. I like the way that it turned out, and it has definitely been a good church activity for a little girl.

I used canvas for the pages. I cut rectangles out of a canvas drop cloth the size that I wanted the pages to be plus a 1/2 seam allowance on each side. I actually drew the seam allowance lines on so that I knew where to end what I was putting on the pages. I ended up using a combination of paint, felt, and foam to create each page, and then used both magnets and velcro to attach the pieces. When I finished the individual pages, I decided which order I wanted them in and laid them all out. I took the page that I wanted to be the first one, and sewed it right side together with the second page leaving the side open that would be binded to the book. I then sewed page 3 to page 4, etc. I then turned them right side out and used a 2" piece of felt to finish the raw edges. I placed 3 grommets in the overhang of the felt and used 3" binder rings to attach all of the pages together.

Page 1: As you can see is still not quite finished. (a year plus later) I still plan on adding some leaves for fall, and a tent and a campfire for summer. The season names are attached with magnets so they can be taken off and on.

Pages 2 & 3: A barn with finger puppet animals and a duck pond. I got the barn and finger puppet patterns from Homemade by Jill. They are free on her blog. I traced them onto my canvas with a pencil and then painted in the lines. I used felt for the barn doors, the pocket for the animals, and the animals. I also got the idea for the duck pond from her blog, but made up my own pattern for that. I planned on adding some more details to the pond, but haven't yet.


Pages 6 & 7: Color wheel and crayon box. I wanted a fun way to practice learning colors, so on one side I painted a color wheel and on the other I made a crayon box to hold the different color crayons. She can pull them out of the box and match them to the corresponding color on the wheel.

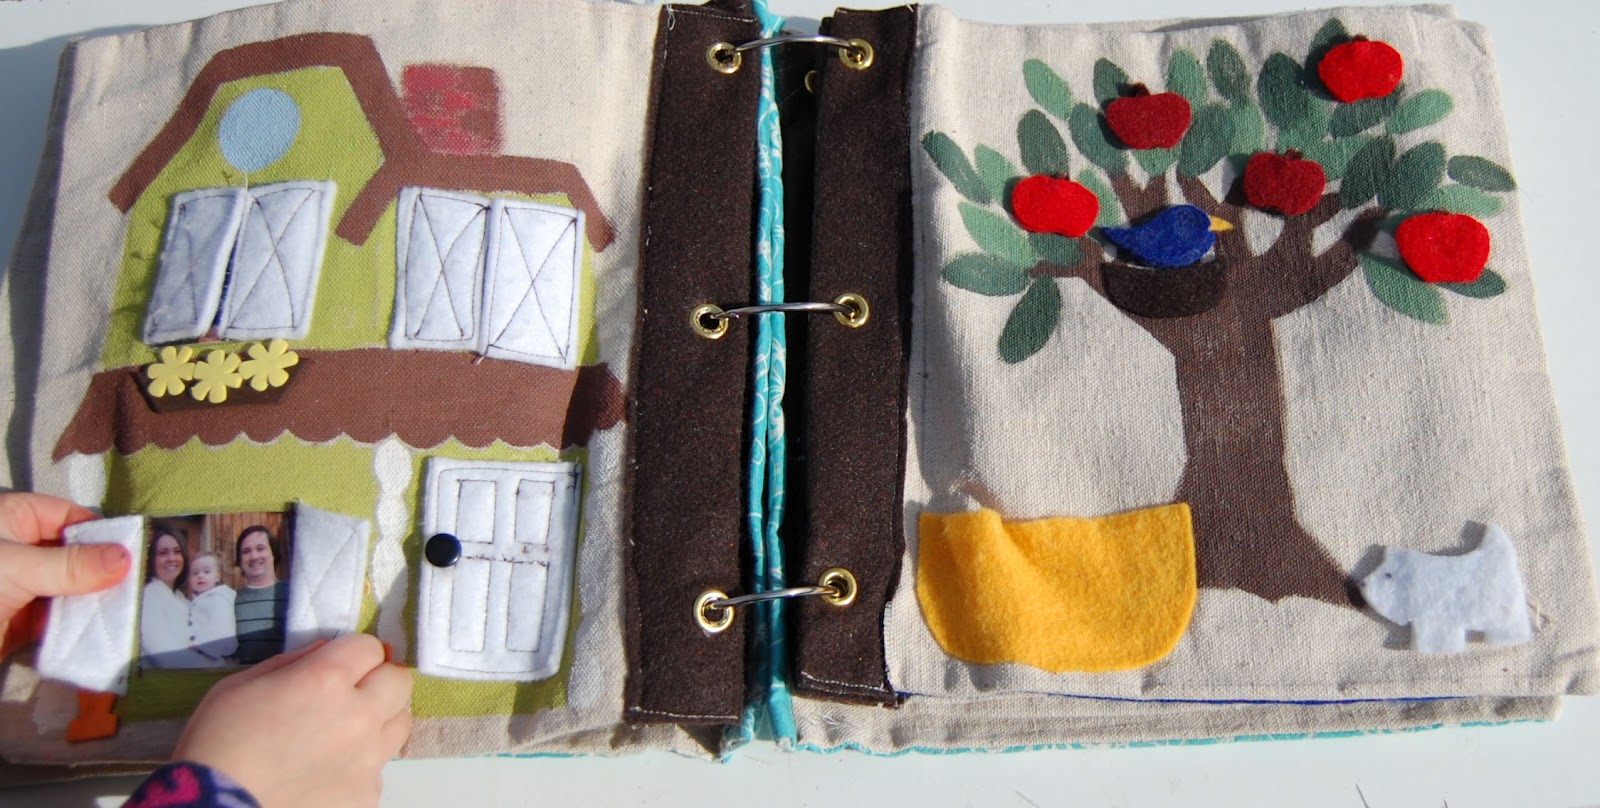
Pages 10 & 11: House and tree. I thought that it might be fun to have a house with windows and a door that opened up to pictures of my little girl, our family, and her grandparents. I drew the house on, painted it, and then sewed on felt shutters and a door so that they would open, then I sewed a small pieced of clear plastic into each opening to create a pocket so that I could slide the pictures in. The tree pattern and apples are from Homemade by Jill.

Page 12: Noah's Ark. I drew and painted the ark on, and then sewed a brown felt piece on to create a pocket for all of the animals to fit in. For the animal patterns, I found images that I liked online, printed them, and cut out the pieces to trace onto felt. I then used felt glue to piece them together.

Page 13: Under the Sea. This page was cooler in my head. It did not turn out like I wanted it to. I wanted it to be more of an "Eye Spy" type of page, but ended up with a clear bag full of sea animals that is too thick to stick on the page. She does have fun playing with and naming the animals though.

Pages 14 and 15: Shape page. For these pages, I wanted to help my little girl learn her shapes, so on the one side I painted the shapes on, and on the other page the shapes are part of a bigger shape. She can pull the shapes out and match them up on the other side.

Pages 16 and 17: Driving map. I thought that it might be fun to create a little city with roads for her to drive toy cars on. This is another one that I just kind of made up the pattern as I went, drawing it on with pencil first and then painting in the details. On the right side I sewed in some felt pockets for her to keep her cars in.

Page 18: Lady bug counting. On this page, I painted two lady bugs on leaves. I put velcro on their spots, and then cut out foam circles to put on the velcro. I put vinyl numbers on each of the circles, so that she could learn her numbers as she pulled them off and on.
That's it. That's my quiet book. In the past 14 months, it has helped us make it through many church meetings, and it has been great to have. I don't know that I am ambitious enough to make more quiet books in the future for other children, but the pages are removable so that they can be shared.
Here are a few links that I found helpful for ideas:
Homemade by Jill
Oopsey Daisy
-Mandi
Linking to: Creative Itch.
These are such cute pages! I really love the seasons, the color wheel, the dresser and girl, and the car pages! They are very nicely done!
ReplyDeleteThanks. It was fun coming up with the page ideas.
DeleteOh my gosh aren't you so clever! What a great job!!! Thank you for sharing with us at "The Sunday Stop".
ReplyDeleteHugs,
Bj
Another Sunday stop linky party has started! I hope you stop by again and share soon. Hugs,
ReplyDeleteBj
prabhat satta
ReplyDeletefinal ank
220 patti
prabhat satta matka
final ank
220 patti
indian matka
kalyan final ank
kurla day